Open a Euro sanke keg
Release the pressure, unscrew the valve, free the safety latch, lift out the spear. Every step, with drawings and photos of what is inside.
Safety first. A keg holds gas under pressure, even one that feels empty. Release all the pressure before you try to open it, every time. Aim the valve away from yourself and from anything that matters. Wear eye protection. Work outside or somewhere that can take a soaking.
Which keg have you got?
Most guides to taking a sanke keg apart describe the American type. Those have a split ring that holds the valve in place. Some Miller kegs have screw-type fittings instead.
This guide is for the European sanke: a screw-in, threaded valve and a different style of anti-tamper safety catch from the Miller kegs. If your valve is held by a split ring, you have the American type and this page does not apply directly. The pressure warning does.
You will need: a keg coupler (or a big spanner), a basin wrench, a screwdriver, a torch, and a plank with notches cut in it to use as a lever. A vice helps if you plan to take the spear apart. A hammer is the last resort.
Let the pressure out
Do this before anything else, every time. A keg that has been left lying around can build up pressure, and a keg that is opened under pressure can throw its valve assembly out with real force. One account tells of a spear that shot through two floors of a house.
There are two ways to release the pressure. Some people lay the keg down and press the valve in with a big spanner. The other way is to fit a keg coupler and engage it, which is what we show here. The first time this was tried, beer flew into the air and rained back down. Point the keg at something you do not mind drenching in stale beer, and keep your face and body clear of the valve.
Wait until the hissing stops. If the keg has been stored, repeat the release even if you have done it before.
A keg standing with a coupler engaged on top and gas and beer spraying sideways, away from the person. Unscrew the valve
On a European sanke the valve screws in, instead of being held by the split ring that American kegs have. Use a basin wrench, which you can buy at a DIY store. Place it so that its prongs meet the tabs in the valve, then simply unscrew it.
There is no left-hand thread to worry about. It turns anticlockwise like an ordinary thread.
Top view of the keg neck with four tabs on the valve ring and an arrow showing anticlockwise rotation. Find the safety latch
Unscrewing the valve is not the end. The valve is held down by a safety latch as well, much like the one on Miller-style threaded valves. On a Miller keg the latch is a hinged piece of metal that can be moved by pushing a screwdriver through the seal after pressing the valve down. The Euro sanke latch is slightly different, though a screwdriver pushed into it has the same effect.
On this keg the latch sits just clockwise of the tab that has an S engraved on it. You can just about see it by shining a torch through into the seal.
Top view of the valve ring with the latch marked just clockwise of the tab engraved with the letter S. 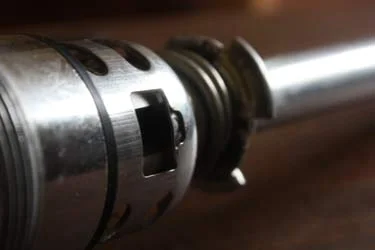
The latch showing through a window in the side of the spear, with a spring and the clip beyond. 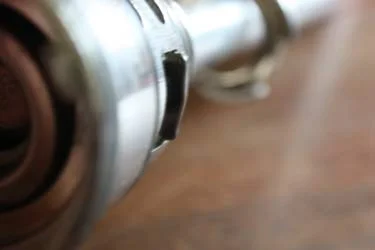
The same latch seen almost end-on, standing proud of the spear tube. Free the latch and lift the spear
Press the valve down, then push a screwdriver in to move the latch. One way to hold the valve down is a piece of plank with a few notches cut in it, used as a lever. Pressing the valve down slightly lets you lift the spear, but not all the way out while the latch is still holding it.
It took one person an hour or two of frustration, and in the end a very unscientific tap on the screwdriver with a lump hammer, before the latch gave way. Treat that as a last resort. Damage to the seal will make the keg useless for storing beer, so use as little force as you can.
Once the latch is released the spear lifts out.
Side view: the valve housing pressed down while the spear tube lifts slightly and stops at the latch. 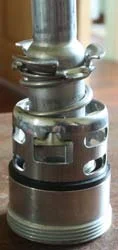
The spear once lifted out: spring and clip at the top, the slotted cage in the middle, the black seal and threaded base below. Take the spear apart
The spear can be taken apart further by pressing down the clip on the lower side and twisting. The spring is quite strong, so this is difficult, and it may not be necessary at all.
Reassembly is just as stiff. One person managed it by clamping the spear in a vice and pressing hard. The parts go back together in the order shown below.
The spear with an arrow pressing the clip down at the lower end and a twisting arrow. 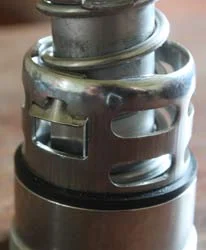
Close-up of the slotted cage with the spring and clip sitting above it. 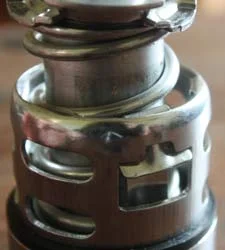
The same cage and spring even closer, showing the retaining clip on top. 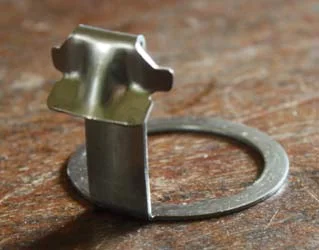
The loose latch with its flat ring, once taken out of the spear.
What is inside
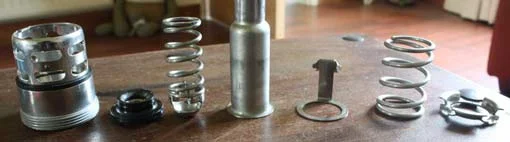
Seven parts come out of the valve. This is the order they go back together, from the cage at the top down to the clip.
- Cage, with its thread and O-ring
- Black seal
- Spring
- Spear tube
- Latch, with its ring
- Second spring
- Retaining clip
The latch pokes out through the outer wall of the spear. That is why the spear lifts a little and then stops until the latch is pressed in.
Troubleshooting
The usual snags, and what they mean.
Beer sprays out when I release the pressure
That is normal on a keg that still has beer in it. Aim it at a drain or a bucket and keep clear. Do not carry on until the hissing has stopped.
The valve will not turn
Check that the prongs of the basin wrench are fully seated on the tabs, and that the pressure is really gone. The thread is a normal one: anticlockwise to undo.
The valve is out but the spear will not come up
That is the safety latch. Press the valve down, and look just clockwise of the tab engraved S. Moving the latch with a screwdriver frees the spear. Be patient, because it is stiff.
The spear lifts a little and stops
The latch is still holding it. Keep the valve pressed down and work the latch free.
I damaged the seal
A damaged seal means the keg will no longer hold beer, so replace the seal before using it again.
I took the latch out
You can run the keg without it, but the keg is then less safe to dismantle next time. Always release the pressure first.
The spear will not go back together
The springs are strong. Clamp the spear in a vice and press hard, keeping the parts in the order shown above.
Now put it to use
With the keg open you can clean it and fill it. Work out how much gas it needs with the carbonation calculator, or read the kegging guide first.